How to setup up a end user SharePoint site for hands on labs.
Option 1 – Use Office 365 SharePoint Online Trial
Requirements:
- Operating System: Windows 7 or Windows 8
- Office 2013 Pro (included as part of the trial) or Office Web Apps
Setup Steps:
- Sign up for Office 365 Enterprise Trial
- Please write down your user name and password
- The default domain for users is company-name.onmicrosoft.com. You can add your own domain later.
- Create sample users
- Go to Office 365 Admin Center > Users and Groups
- Create user: Dave Green
- Create user: Lucy Smith
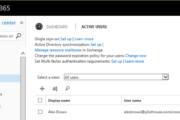
- Find root private site collection
- From anywhere in Office 365, go to Admin > SharePoint > Site Collections
- Under site collections, identity the root site collection (example: https://company-name.sharepoint.com).
- Go to the site collection and make sure to add site collection URL to Trusted Sites in Internet Explorer.
- Rename root site collection to “ABC University”
- On the home page of your new site collection, click on “Your Site, Your Brand” image
- In Site Settings Title, Description, and Logo page, change Title to “ABC University”
- Click OK
- Create sites from templates
- Activate site collection SharePoint Server Publishing Infrastructure and Workflows features. Settings > Site Settings > Site Collection Administration > Site Collection Features
- Download Courses and Chemistry 101 templates (Internet Explorer will rename the files to .zip. Rename it back to .wsp)-Authorized Users Only
- Upload site templates to Solutions gallery and activate them. Settings > Site Settings > Web Designer Galleries > Solutions
- Create a sub site called “Courses” based on “Courses” template.
- On the home page of ABC University, go to Settings > Site Settings > Look and Feel > Navigation. InGlobal Navigation, click on Show Subsites checkbox. Click OK.
- in the Quick Launch Bar on the left, click on Site Contents.
- In Subsites section, click on new subsite. You should now be within the New SharePoint Site page where you specify a title, site url, and access permissions.
- In the Title text box, enter “Courses”. In the URL Name textbox, enter “courses”.
- In Template Selection, select Custom > Courses
- For Navigation Inheritance, click Yes
- Click on Create at the bottom of the page. Once the process completes, you should be on the home page of the Courses site.
- Create a sub site called “Chemistry 101” based on “Chemistry 101” template inheriting the top link navigation. Change Navigation setting to show sub sites at Courses.
- We recommend creating the two site structure for every user that completes the course. Your URL structure might look something like this:
- /courses-tom/
- /courses-tom/chem101
- /courses-kim/
- /courses-kim/chem101
- Alternatively, you can create a site collection for every user that will complete the course.
- Download sample documents(Authorized Users Only)
- Grant each user Edit permission level within the respective site
Option 2 – Use Your Environment
This option is similar to Office 365
Setup Steps:
- Decide whether you will use a separate site collection for every user
- In Central Administration, create a site collection with “ABC University” title and “Team Site” template
- Follow steps from above starting with Create sites from templates


Leave a Reply
You must be logged in to post a comment.